How to Turn a Scanned Document Into a PDF
By PageTranslate Team · · 9 min read
Depending on the files you start with, it is possible to scan paper and have it appear immediately as a PDF. Images already on your computer in JPG, PNG, or even TIFF format can also be combined into single PDF files. However, making the text within an image of a document searchable via a standard word processing program such as Microsoft Word typically requires that you apply the feature known as optical character recognition or “OCR” to your PDF.
We have outlined how to create a PDF from scanned documents in Apple apps and Google apps and how to use free software to handle larger numbers of documents. We have also included links to the latest version of each method’s user guide on October 2, 2026.
Review OCR and layout before use.
Pick the method that matches your starting file
| What you have | Suggested route | What to check |
|---|---|---|
| Paper and an iPhone or iPad | Files or Notes document scan | Complete margins; save the scan, not a screenshot of the note |
| Paper and an Android phone | Google Drive mobile scan | Choose PDF output and the intended storage account |
| Loose pages and a scanner | Scanner's PDF setting or NAPS2 | Duplex setting, resolution and page order |
| Several JPG, PNG or TIFF scans | Import into NAPS2 or a PDF tool | One combined file rather than one PDF per image |
| An existing image-only PDF | OCR the existing file | Text matches the visible page |
| A sensitive document | An approved local workflow | Local storage and any automatic cloud sync |
Changing the file name from ‘scan.jpg’ to ‘scan.pdf’ does not convert the file. The file must go through a write process in the application (i.e. an export/save/print-to-pdf command). Until then the file is an image with a wrong file name.
Scan to PDF on iPhone or iPad
For an iPhone or iPad, scanning a document will result in a file that can be saved directly to a folder within the device. This can be an appropriate way to save documents that need to be sent, such as invoices or restaurant bills.
- Open Files and navigate to the intended folder.
- Open the More menu and choose Scan Documents.
- Hold the phone parallel to the page in even light.
- You let automatically capture the complete page or you take the picture manually. If necessary you can even adjust the corners of the picture afterwards.
- Add remaining pages to the document in the same way, and save the scan of all pages to the file.
You can also scan to Notes and use the support page Apple describes for scanning in Notes. The Note supports scanning as well. When you are done taking photos of the items you want to scan in, you can then open up each photo individually and save it or share it. The screenshot above was taken of a Note that has been scanned in. You can see each photo individually, and can save or share them individually as well.
As for private documents, iCloud uses cloud storage, while On My iPhone stores files locally. Choose the destination according to your privacy requirements, but be aware that local storage on your phone is not 100% private (other apps and/or your company’s phone policies can still back up files on your phone).
In the video above, Apple demonstrates how to scan documents into Notes. Please note that the Scan Documents icon in the attachment menu may look different depending on the version of iOS you are using. Use the written steps above as an alternative reference.
Scan to PDF on Android with Google Drive
Google Drive can also be used to scan multiple pages and create a PDF file. For this reason, Android users should also avoid using Google Drive to complete a project that cannot be uploaded to the online storage space (e.g., because of work restrictions).
- Open the Google Drive app on your Android and go to its camera/scan feature.
- Scan first page. You can then crop and rotate as needed. Continue to scan remaining pages to single document.
- Add subsequent pages to the same scan. Retake any blurry pages rather than trying to get them read by OCR.
- Save under a useful name. Select to save as a PDF instead of JPG.
- Confirm the account and folder, then save.
Note that just because you search for and copy something from an automatically cleaned up scan, that does not necessarily mean the scanned text was 100% accurate. Always compare your scan against the original paper document for things like faint stamps, signatures, decimal points and such on forms that require such to be readable.
Compare the scanned document to the original after all automatic cleaning has been performed. On forms, faint stamps, signatures, and decimal points must be visible in addition to normal text.
Convert existing scans or use a desktop scanner
For work done from a desktop, consider the NAPS2 scanner software, which is free, open-source software for Windows, Mac, and Linux that supports scanners, image imports, re-arranging pages, creating PDFs, and performing OCR on scanned pages.
This approach will also work with image files that have already been scanned, e.g. as individual jpg files. The files can then be imported, re-ordered and rotated as necessary. The necessary pages can then be saved as a single PDF file. A numbered filename with leading zeros (e.g. page-001.jpg) helps to maintain the correct order of pages. Without the leading zeros, pages with two digit page numbers (e.g. page-10.jpg and page-02.jpg) would be sorted alphabetically, i.e. page-10.jpg would come before page-02.jpg.
Whether printed documents, bound documents or even sensitive originals, (double-sided) sheets are fed in via a feeder or scanned on the flatbed. The correct paper size is selected for each original. Mild compression may then be applied after scanning (in case of large numbers of originals), but only after checking the original, uncompressed PDF.
When scanning printed text, you can start with the following settings:
- 300 dpi. Check for too small print before scanning the entire batch of documents.
- Grayscale for plain text where color carries no meaning.
- Color for highlighted instructions, color-coded diagrams, stamps or annotations.
- Make sure to select the correct paper size instead of forcing every original to scan in Letter or A4 size.
- Moderate compression only after checking the uncompressed result.
Important: Any receiving organization may have special requirements regarding resolution and colormode. These requirements supersede the settings provided above, especially when the submission is to be archived or is of a formal nature.
If you already use Acrobat
The Adobe tool Adobe Acrobat (paid software as Adobe Acrobat Reader does not have all the features to create documents with OCR) creates PDFs from scanner inputs and can even read out text from them. Adobe’s documentation on the topic also describes the available presets, page management and the language for the Optical Character Recognition.
There are, however, likely features that you would not use if you only had Acrobat Reader (i.e. the free version of Acrobat) installed on your computer.
Image PDF versus searchable PDF: the important difference
An image PDF is made up of page images. A searchable PDF contains the same page images plus a text layer on top of them. The OCR software creates the text layer.
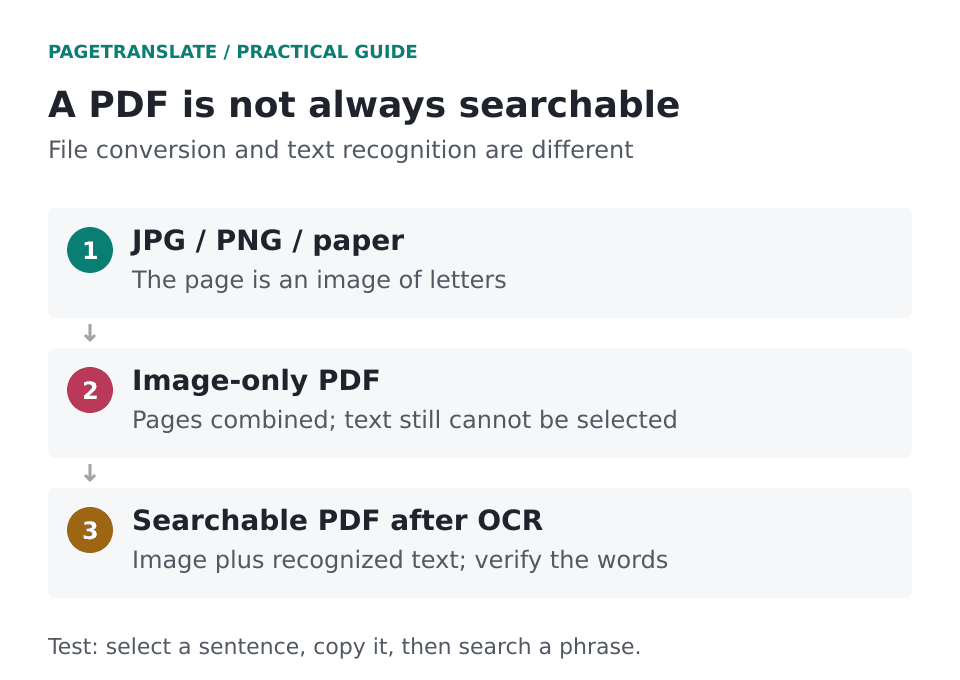
Saving the page images as a PDF does not automatically create a PDF with searchable text.
To add a text layer on top of the images to create a Searchable PDF, you open the PDF in an OCR tool. Then you select the document language (e.g. English, German) or – in case of multilingual documents – a combination of supported languages (e.g. English/Spanish, French/German). After completing the OCR process, save a new copy of the PDF-file. The original scan will remain intact.
Three quick checks will reveal common problems:
- Select and copy a sentence into a plain-text editor. Check the words for correct spelling and sequence.
- Test the search for a distinctive phrase on the middle page of the file. It must find all occurrences of the visible text.
- Decimal places, serial numbers and similar characters such as 0/O and 1/l can also be fragile to OCR.
The fact that a single word or phrase was found does not necessarily mean the entire file was OCRd. The first page may have come in clear and the middle page faint, and thus resulted in very poor OCR.
Combine, compress and share without losing information
Before you attempt to reduce the file size, it is best to first verify that all pages have been captured and that they are in the proper order. If there were any ‘accidentals’, then these will need to be removed from the file before it can be compressed. Also check the first and last pages of the file and make sure that right-side pages (fronts) of double-sided materials have been captured in the correct order.
Even if you use compression to get a PDF within a file upload size limit, compressed PDFs with very small text can look awful. So test the compressed file against the original. If your scans are bigger than you need for the particular items you are scanning then it might be better to rescan them rather than try to compress a lot of unwanted information from large scans.
Several tools that appear in a row in the PDF software that you already use do very different things.
- Note that simple “Merge PDF” tools do not perform OCR and therefore will not create an editable file.
- These tools perform very different functions to merging PDFs together. While OCR (Optical Character Recognition) can recognize letters within a scanned image of a page, this does not necessarily mean that the resulting text will form a correct and readable layout of
- Compression reduces size but does not fix blur.
- Password protection of PDFs limits access to the content but does not remove content that is considered to be sensitive.
- Some programs also have a redaction feature, but a simple black box drawn with a drawing tool won’t be enough – this can often still reveal hidden text underneath.
Be more concerned with the confidential material than with the choice of converter to use. See where the converted files are stored, who has access to them and for how long they will be kept by the converter. For workplace documents, use the organization’s approved tools to work with documents and approved ways to share them.
What our scanned-book run taught us
We have been testing the PDF processing of a 344 page historical scan of “Alice’s Adventures in Wonderland” over the past week. We were able to complete the upload of the 3 pages required for testing, followed by the OCR processing, translation and download of the processed PDF. The pages were all kept in the same dimension and with the illustrations.
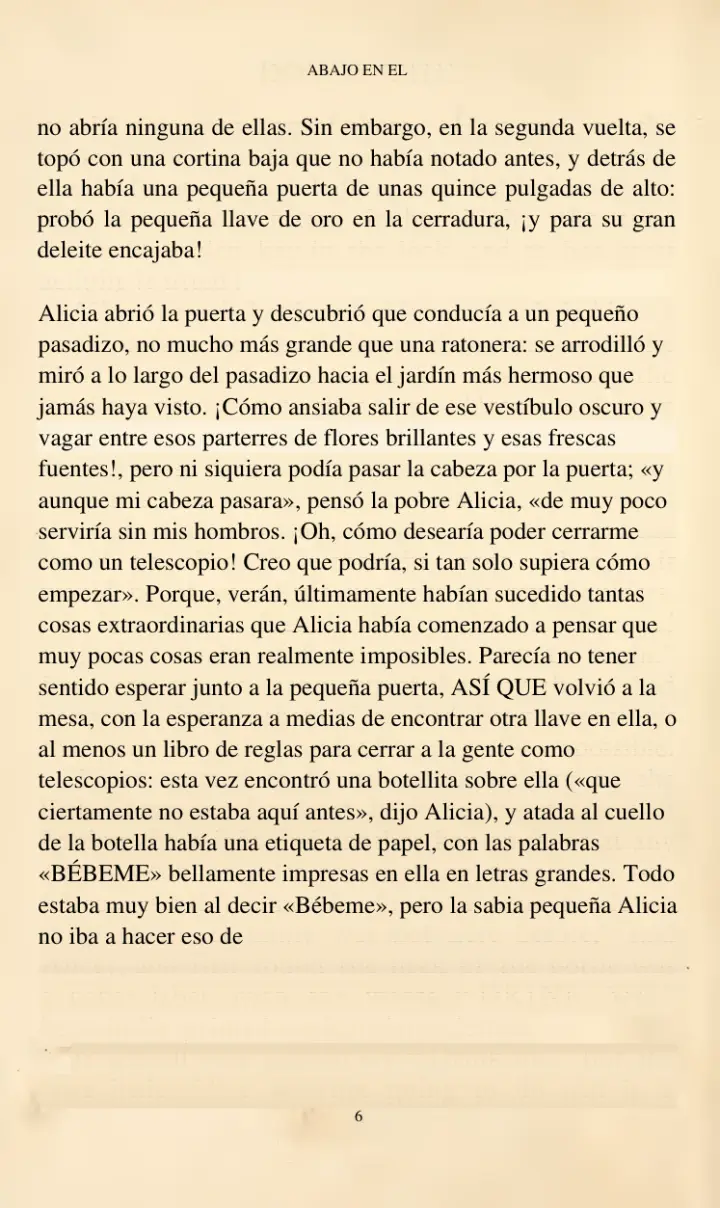
Scanned PDF before editing – all the original lettering was there, most obviously around the picture.
The fully processed page was not without its flaws, however – faint source lettering would show up occasionally, often with uneven font sizes and poor rendering of text to the right of illustrations. Clearly, more work was needed to be done with this page.
But before committing to a large batch of pages, we recommend to test a similar but more difficult page first – e.g. text wrapping around an image, two column text or faint stamps. A simple title page will not expose potential limitations.
Translate the scanned PDF after checking it
PageTranslate uses OCR for PDFs. In other words, it translates your scanned PDF. In order to Translate the Scanned PDF, you upload the scanned PDF file and choose output language and PageTranslate will translate scanned PDF and provide translated PDF.
PageTranslate does not create a editable DOCX document and no side-by-side bilingual PDF is created. The original file is left intact, and the translated PDF compared against it. Our large-PDF guide shows how to handle longer PDF documents, currently within set limits and on quote.
For a manual with warnings, technical information, etc. to be usable, a readable PDF is only the beginning. Review that document for technical accuracy with the technical-document checklist.
Check a difficult page. Use qualified review for high-stakes documents.